Thu 31 January 2019
Dynamic Images in iOS Push Notification Extensions
Some time ago, I read an interesting article from The Guardian about their work with a concept they call "Live Notifications". The general idea is being able to do more with push notifications, turning them into a rich experience with dynamically generated or updated assets. I experimented with this on my own when I wanted a simple way of charting some personal data; I have a server that periodically checks a source, and notifies based on updated findings (yes, this is as generic a description as it can get - it's personal). Rather than generating and storing images on a server that'd only be needed once, couldn't I just dynamically generate them client side?
Turns out, it's not super complicated in the grand scheme of things. Using an iOS Notification Content Extension or iOS Notification Service Extension, it's possible to have a lightweight process running that can act dynamically on received push notifications. This is the key - we'll send a lightweight payload via Apple's Push Notification Service (APNS), and then build and attach an image to the notification before it displays.
Limitations
There are, surprisingly, not too many limitations... but there's one or two to know about.
- Usage of portions of
UIKitis pretty much impossible - for instance,UIApplicationis out, but you can useCoreGraphicset al as necessary. - The memory limitations are much smaller and the system is more aggressive in killing your extension if you're not careful, so it's best to keep this efficient. I'd highly recommend sending a default notification with usable title and text, and then customize it as necessary when you do the image.
- If you want to access
NSUserDefaults, you'll need to ensure you're using an App Group to communicate between processes properly, as the extension lives separately from your app. - Oh, and if you use Realm, it's a little tricky to read data in extensions (as of writing this, I don't believe it works properly). I've only used this in situations with
NSUserDefaults,Core Data, orSQLite. I'm sure there's a method for Realm, but you're on your own for that.
Building the Extension
For this example, we'll assume you have an iOS app that's properly configured for push notifications. If you're unsure of how to do this, there's enough guides around the internet to walk you through this, so run through one of those first. The example below also makes use of the excellent Charts library by Daniel Gindi, so grab that if you need it.
We'll start with a standard iOS Service Extension, and wire it up to attempt producing an image in the didReceive(...) method. We'll implement three methods, and support throwing up the chain to make things easier - it's less ideal if an extension crashes, because getting it restarted is... unlikely. We'll simply recover "gracefully" from any error, but due to this it's also worth getting right in testing.
import UIKit
import UserNotifications
import Charts

class NotificationService: UNNotificationServiceExtension {
    var contentHandler: ((UNNotificationContent) -> Void)?
    var bestAttemptContent: UNMutableNotificationContent?

    override func didReceive(_ request: UNNotificationRequest, withContentHandler contentHandler: @escaping (UNNotificationContent) -> Void) {
        self.contentHandler = contentHandler
        bestAttemptContent = (request.content.mutableCopy() as? UNMutableNotificationContent)

        if let bestAttemptContent = bestAttemptContent {
            bestAttemptContent.title = "\(bestAttemptContent.title) [modified]"

            do {
                buildChartAttachment(request)
            } catch {
                // Assuming you sent a "good enough" notification by default, this should be
                // safe. We can log here to see what's wrong, though...
                print("Unexpected error building attachment! \(error).")
            }

            contentHandler(bestAttemptContent)
        }
    }

    override func serviceExtensionTimeWillExpire() {
        if let contentHandler = contentHandler, let bestAttemptContent =  bestAttemptContent {
            contentHandler(bestAttemptContent)
        }
    }

    // The three main methods we'll implement in a moment
    func renderChartImage() -> UIImage? {}
    func storeChartImage(_ image: UIImage?) throws -> URL {}
    func buildChartAttachment(_ request: UNNotificationRequest) throws {}
}
Rendering the Chart
For the sake of example, we'll make a very basic LineChart using bogus data. In a real world scenario, you'd want your data to fit into the space of a push notification (2kb - 4kb, which is actually a good amount of space). You could also use a different type of chart, if you wanted. The use cases here are pretty cool - imagine if RobinHood allowed you to, say, see a chart at a glance of how your portfolio is doing. Depending on the performance, that chart could change color or appearance to convey more information at a glance.
Granted, you might not want that much information being on a push notification. Maybe you have prying eyes around you, or something - privacy is probably good to consider if you're reading this and looking to implement it as a feature. The chart below has some settings pre-tuned for a "nice enough" display, but you can tinker with it to your liking.
func renderChartImage() -> UIImage? {
    let chartView = LineChartView(frame: CGRect(x: 0, y: 0, width: 320, height: 320))
    chartView.minOffset = 0
    chartView.chartDescription?.enabled = false
    chartView.rightAxis.enabled = false
    chartView.leftAxes.enabled = false
    chartView.xAxis.drawLabelsEnabled = false
    chartView.xAxis.drawAxisLineEnabled = false
    chartView.xAxis.drawGridLinesEnabled = false
    chartView.legend.enabled = false
    chartView.drawGridBackgroundEnabled = true
    chartView.drawBordersEnabled = false
    chartView.setScaleEnabled(false)
    chartView.contentScaleFactor = 2
    chartView.backgroundColor = UIColor.black
    chartView.gridBackgroundColor = UIColor.green

    let dataSet = LineChartDataSet(values: [
        ChartDataEntry(x: 1, y: 2),
        ChartDataEntry(x: 2, y: 5),
        ChartDataEntry(x: 3, y: 7),
        ChartDataEntry(x: 4, y: 12),
        ChartDataEntry(x: 5, y: 18),
        ChartDataEntry(x: 6, y: 7),
        ChartDataEntry(x: 7, y: 1)
    ], label: "")

    dataSet.lineWidth = 4
    dataSet.drawCirclesEnabled = false
    dataSet.drawFilledEnabled = true
    dataSet.setColor(UIColor.green)
    dataSet.fillColor = UIColor.green

    let data = LineChartData(dataSets: [dataSet])
    data.setDrawValues(false)
    chartView.data = data

    return chartView.getChartImage(transparent: false)
}
Note that the size of the chart is hard-coded, and that the scale is manually set. Both are critical for pixel-perfect rendering; the logic could certainly be better (e.g, larger phones really need the scale to be 3), but the general idea is showcased here.
Storing the Image
We now need to attach the image to the notification. We do this using a UNNotificationAttachment, which... requires a URL. Thus, we'll be writing this to the filesystem temporarily. This method attempts to create a temporary directory and write the PNG data from the chart image returned in our prior method.
func storeChartImage(_ image: UIImage?) throws -> URL {
    let directory = URL(fileURLWithPath: NSTemporaryDirectory(), isDirectory: true)
    try FileManager.default.createDirectory(at: directory, withIntermediateDirectories: true, attributes: nil)

    let url = directory.appendingPathComponent("tmp.png")
    try image?.pngData()?.write(to: url, options: .atomic)

    return url
}
Note that, in my testing, simply writing to the same URL over and over again didn't impact multiple notifications - i.e, you're not overwriting an old image that might be on the screen. I've no idea if this will change in later iOS revisions, though, so keep it in the back of your mind!
Putting it all together
With the image saved and ready, we can attach it to the notification and let the system display it to the user.
func buildChartAttachment(_ request: UNNotificationRequest) throws {
    let chartImage = renderChartImage()
    let url = try storeChartImage(chartImage)
    let attachment = try UNNotificationAttachment(identifier: "", url: url, options: nil)
    bestAttemptContent?.attachments = [attachment]
}
And voila, you now have a dynamically generated chart. No need to worry about rendering images server side, storing and caching them, or anything like that!
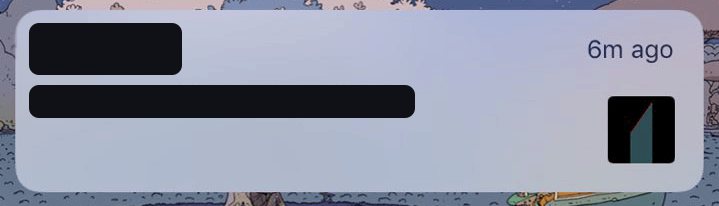
Your chart hopefully looks better than this demo image I found laying around from my test runs. :)
...surely there must be a catch...
Yeah, there's a few things to consider here.
- You're technically pushing the processing requirements to the user's device, but in my testing, this didn't cause significant battery drain over time. If you opt to do this, consider the time interval that you're pushing notifications on.
- As mentioned before, you should design notifications such that they're sent "good enough", in case a notification extension crashes or is killed by the OS for whatever reason. This means ensuring a good default title, body, and so on are sent.
- If you use this for financial data, which would not surprise me as the chief interest here, you should consider making this feature "opt-in" rather than "opt-out". Charts can convey a lot more than text at a glance, and people might not want their information being blown out like that.
But with that all said, it's a pretty cool trick! Due credit goes to The Guardian for inspiring me to look into this. If you find issues with the code samples above, feel free to ping me over email or Twitter and let me know!